info@classy.studio
 +92 315 3546728
In 2026, as technology has advanced and our lives have become more digitalized, quality audio recording is more important than ever. So when you’re recording an audio, it goes without saying that high sound quality matters.
The audience expects audio to be clear, whether it’s a podcast, a social media reel, an unboxing video for YouTube, or simply music. So if your audio quality is poor, the audience will move on to someone else’s content.
Also, if you create audio material for your company, the sound quality must be top-notch. If the audio quality is ineffective, then it might lead to a decrease in sales and a negative reputation for the organization.
But how to improve sound quality? Should I have a high-quality audio recorder? Or maybe some tips will do? Well, read this guide to help you improve audio quality so you can begin producing exceptional content in no time!
Why Does the Audio Quality Matter?
If you are someone who belongs to the radio era, do you remember the urge to reach the volume knob and turn it off due to poor sound quality? Ah, I surely do, and what an extreme frustration it was.
But in 2026, we don’t want our audience to suffer. It’s time to end those muffled voices, crackling echoes, and ambient sound to make a soothing experience for human ears.
Also, talking about videos/visual content, like full 3-hr movies to short social media reels, audio quality matters equally in this form of content too. In addition, it is a significant way to improve audience engagement and keep them hooked.
And how can I forget to mention transcribing videos, such as online meetings, discussions, or creating subtitles for movies? That can only be performed effortlessly when the sound quality is top-notch.
I know you must be wondering if transcription can be done using AI tools. But let me tell you that they also require clear audio to understand. Although they are getting better with time, for now, AI tools are not as smart as humans.
In technical terms, high-quality audio is determined by bitrate levels. Bitrate levels define the amount of data per second used for audio or video. This generally means that the higher the bitrate levels higher the audio quality. Moreover, an audio file under 90 kbps will have a noticeable drop, even for listeners with no formal audio training.
What Factors Cause Audio Quality Issues?
Now that you know the importance of high-quality audio, you must be curious to find out the ways to improve it. But first, let’s discuss the factors that contribute to low-quality audio.
This way, you will be more prepared to prevent these issues and fix them like a pro.
Microphone Placement
The first step is to record through a microphone. But how far a microphone should ideally be placed for incredible voice capturing?
For most voice-over, podcasting, and vocal recording scenarios, a professional brand like Classy Studio places a microphone 2-6 inches away from the mouth. In addition, the farther you are from it, the more difficult it will be for the mic to capture the voice.
So keep in mind that placing your microphone too near or too far will lead to picking up background voice and distracting sounds. Also, moving your microphone mid-recording will change how loud and clear the sound is.
Hence, the key is to strike the right balance (not too loud or too slow sound) and make it perfect for the listeners.
Background Sound
Background noise distracts from your actual message. And it’s a big time-sucker in the post-production to remove background noise. Also, it can be a dog barking, people talking, or many other noise occurrences.
Also, if you’re recording from your office, home, or somewhere noisy where you spend a lot of time, then you might not easily notice them. But the listeners will pick up on them immediately.
This is when connecting with a professional audio recording studio benefits the most.
Low-quality Equipment
Of course, it will be noticeable if you use low-quality equipment for recording. After recording, when you listen to it, the voice might be cracked or muffled. And this is the proof of using poor-quality equipment.
Moreover, default microphones in laptops, computers, or phones have become better with technological advancements. However, it’s still best to use advanced and professional microphones for better sound quality.
Effective In-Session Recording Tips To Improve Audio Quality
Once you know what mistakes are often made in recording and have tested everything, you have aced half of the process.
Here are a few tips to improve the audio quality of a session:
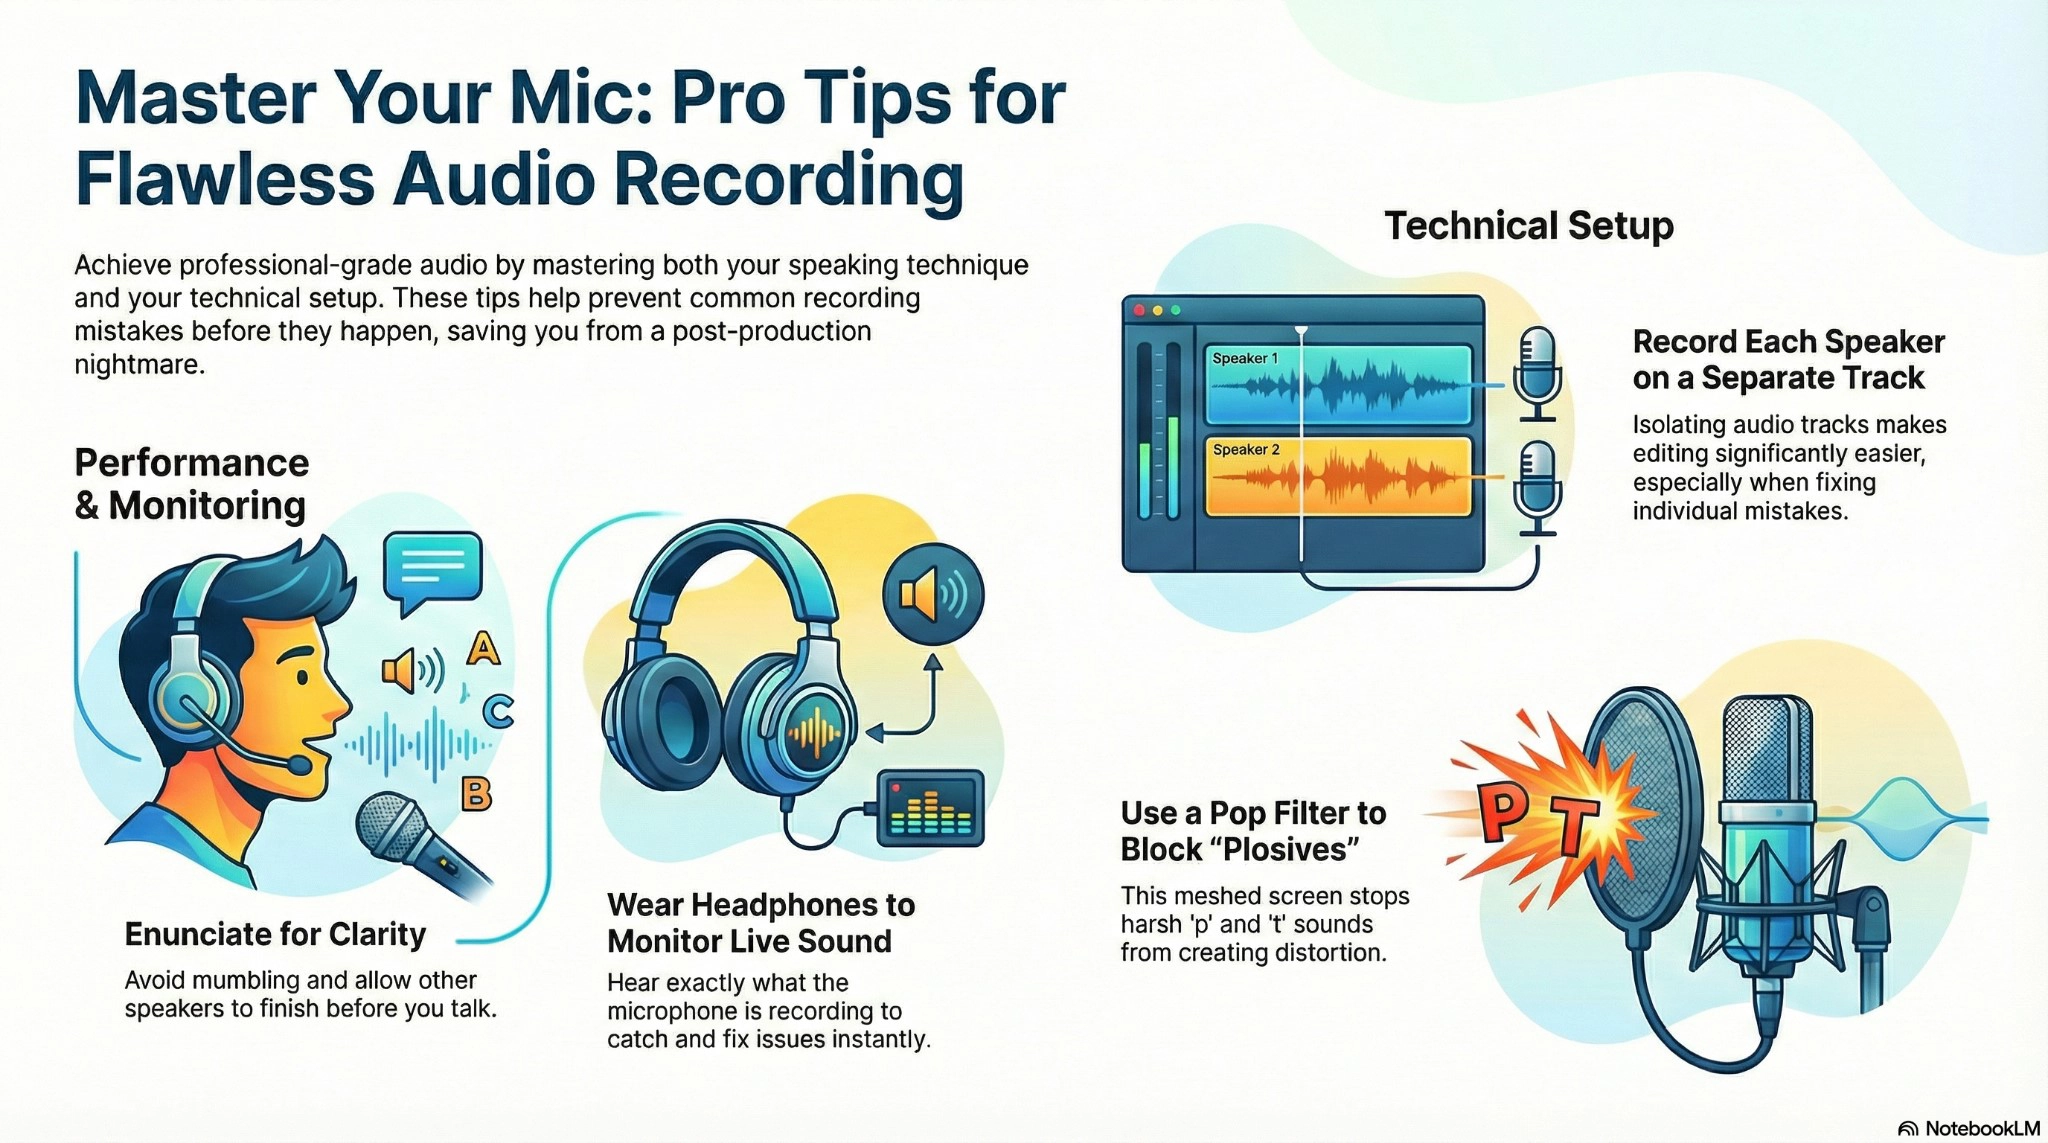
Pronounce Clearly
One of the best recording tips is to enunciate clearly. The key is to speak clearly without being too loud and hold that momentum.
In addition, it’s easy, especially when you’re recording a podcast or an interview. But remember, if you are a mumbler in real life, you won’t fly on mic. Because different people are speaking in the audio, it becomes hard to understand.
Make sure to consider other speakers as well and don’t cross-talk with each other. Take turns and allow other participants to speak.
Wear Headphones
Here’s what you need to know: your earphones listen to sound differently from the microphone. Hence, it’s vital to wear headphones to monitor the sound that is being recorded on the microphone.
With headphones on, you will hear the same thing that is picked up by the microphone. And so you will notice different sound levels between you and other speakers.
Consequently, it’s the best way to prevent issues right at the moment rather than fixing them at the editing stage.
Record Separate Tracks For All Speakers
If there are multiple speakers, record each person on a different track. And for this, you will require different microphones and some basic recording software.
Moreover, separate audio tracks will speed up your editing, especially when there’s an issue with any audio track.
For example, if one of the speakers conversed loudly or struggled with a tic, it becomes easier to edit and save yourself from the post-production nightmare.
Utilize A Pop Filter
Without a pop filter, your words will be plosive, not EXPLOSIVE, but plosive. This means that hard consonants like p, k, t, etc, coming out of your mouth hit hard on the microphone.
Hence, this causes loud and uncomfortable distortion for the listeners. And if you are wondering what a pop filter is. It’s a meshed screen placed in front of the microphone to block harsh popping sounds and make the vocal recording clearer and smoother.
Enhancing Audio Quality During Post-Production
No matter how careful and prepared you are while recording, at the end of the day, we are all humans and make mistakes. And therefore, your audio needs to be edited to ensure perfection.
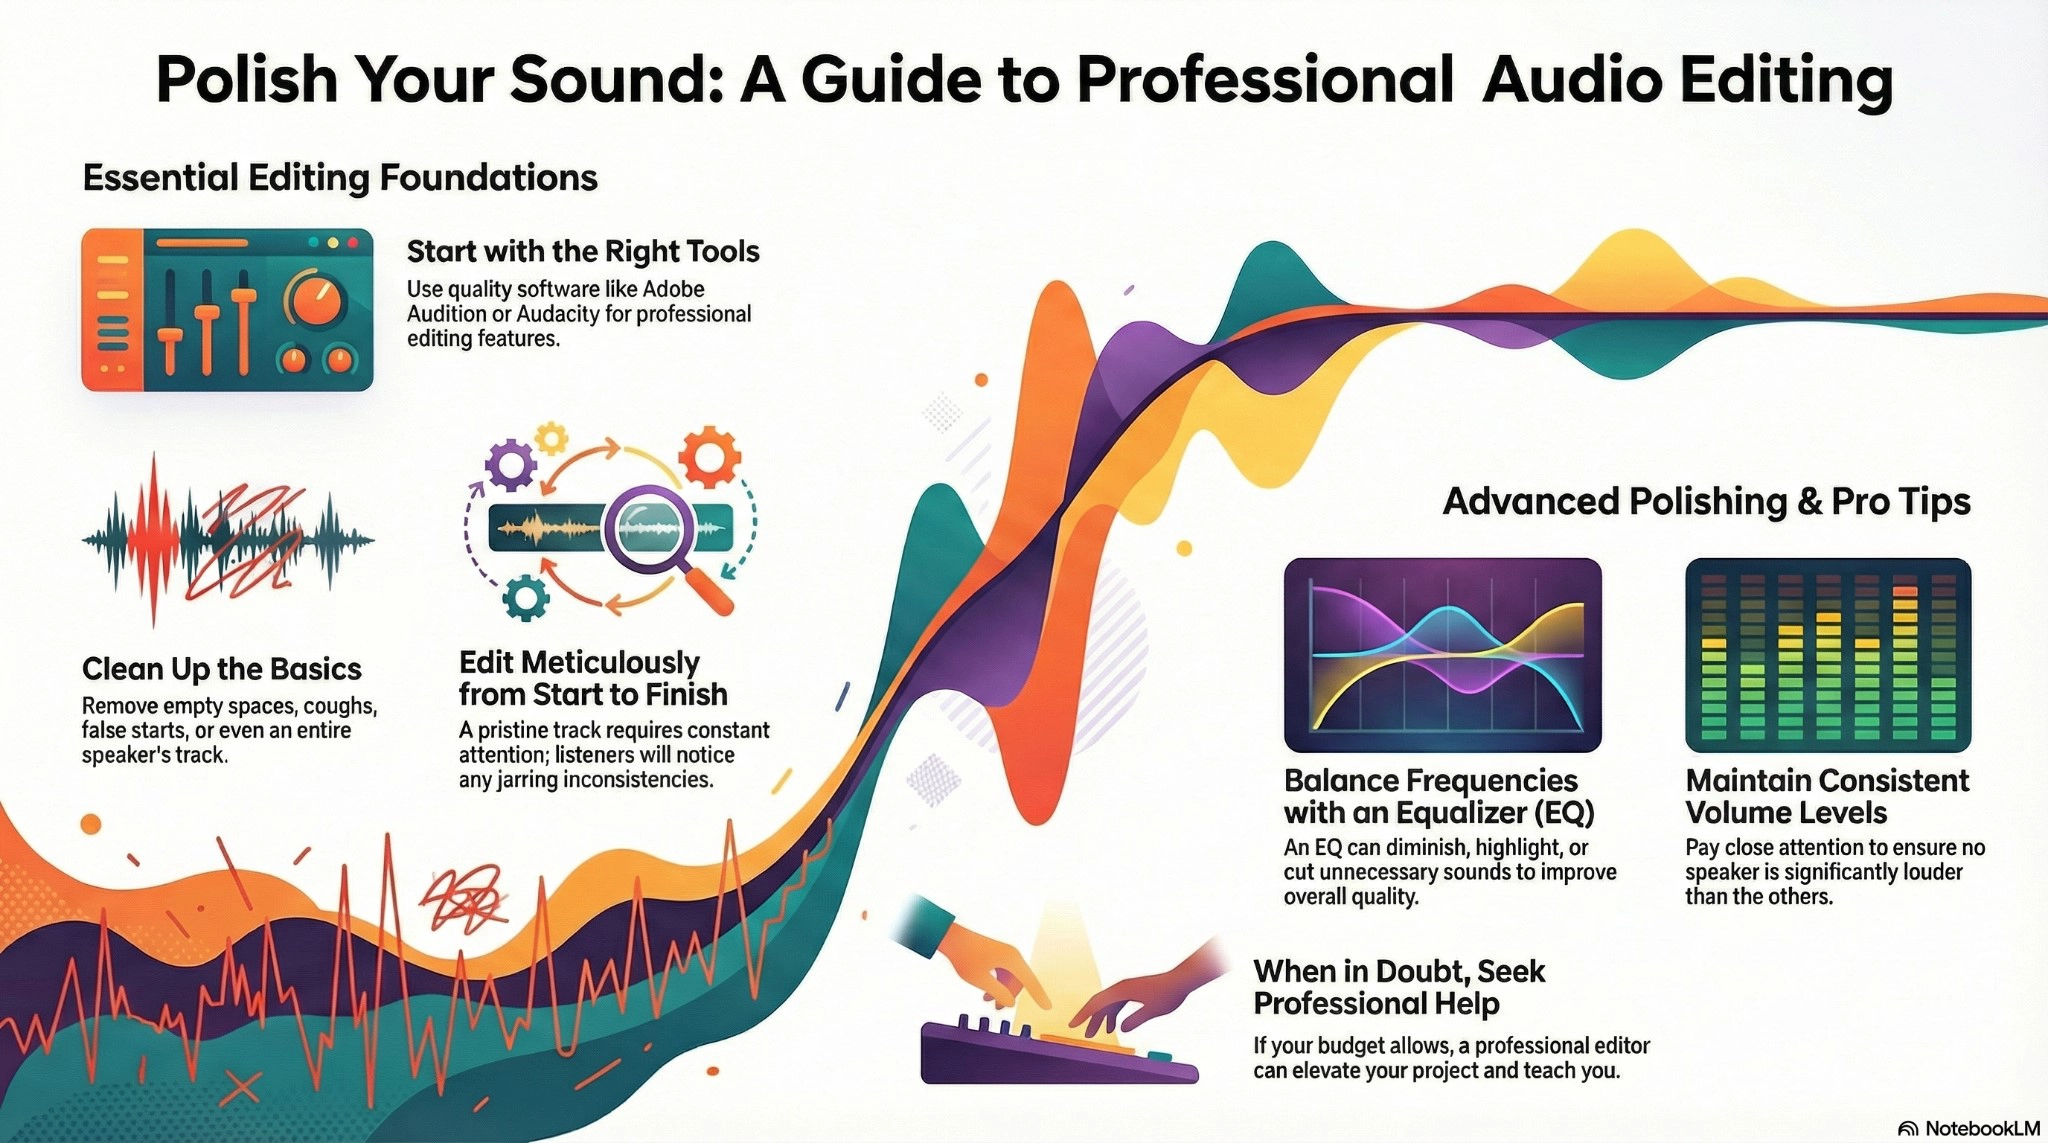
At this stage, you can tighten up the track length by removing empty spaces, coughs, or false starts. You can also remove one speaker entirely if you want to (why we record on different tracks).
Use Good Editing Software
Good audio editing software can mean different things to people. But for us, the perfect example of good audio editing software includes Adobe Audition or Audacity.
This software provides you with everything important and takes your project from recording to the successful publishing stage.
Furthermore, you could publish your content without formal editing. But it would sound bad and unprofessional. And using them offers you advanced editing tricks that are worth looking into!
Edit Meticulously
Interestingly, the better you edit, the more carefully you need to edit. Okay, let me explain this in detail.
Well, if your soundtrack is filled with aural clutter, then your listeners will stop paying attention to the noise. And of course, they will also ignore the overall project. So yes, this isn’t an option for us.
However, if you edit carefully and ensure a pristine track just for the initial few minutes, it will be jarring. So this is why you need to be attentive all the time while editing.
For example, no coughs, tics, awkward pauses, or sounds that don’t belong to the track. Also, make sure to pay attention to levels and that no speaker is louder than the others.
Let them breathe, but also eliminate the pauses that take way too long to the ears. So, ensure to listen carefully because the listeners notice everything. And of course, we want to share good content with them.
Equalize Your Audio
The stage of using an equalizer is an advanced tactic, but it also often tends to be a “you will know when it’s right to hear it.”
It makes the audio track from good to great. Also, with the use of an equalizer, you can diminish, highlight, or cut unnecessary sounds and frequencies completely from your track.
As a result, this balances the overall sound quality and is a blessing to the ears. However, it takes practice to get it right, so be patient, guys.
Seeking Professional Assistance
Editing sound soundtrack is not child’s play. And therefore, it’s often suggested for beginners to seek help from a reliable recording studio in Karachi.
They have professional editors for your project and also help you walk through the editing process. In addition, you can ask them what to listen for, how to easily solve particular problems, or anything else you might need to know.
And of course, if your budget allows, connect with a professional editor every time.
What Are the Signs of Poor Quality Audio?
Generally, you don’t know if your audio is bad until it’s too late. Well, prevention is the best editing tool that not only improves the quality but also saves your time.
So you must know the signs that cause bad audio. These include:
-
-
Low-quality microphone or equipment.
-
Sitting too close or too far away from the microphone.
-
Fidgeting or moving around.
-
Not using pop filters.
-
Recording in an echoey room.
-
Not using headphones.
-
Jittery or stuttering audio.
-
The audio contains background noise.
-
List of Essential Equipment to Record Audio Track
Before you begin to record, make sure that you have all the essential equipment for recording the best quality soundtrack.
These include:
-
-
Computer
-
Digital Audio Workstation (DAW).
-
Audio Interface
-
Microphone
-
Headphones
-
XLR cables
-
Mic stand
-
Pop filter
-
Studio monitors
-
Acoustic treatment
-
Recording software like Audacity, Adobe Audition, GarageBand, Ableton Live, etc.
-
Studio monitors and speakers
-
MIDI controller
-
Digital mixer
-
Plugins and virtual instruments
-
Guitar pedals
-
Get your hands on this must-have equipment to ensure a professional audio track!
Final Words
We don’t say that it’s easy to record a smooth and professional audio track. But it’s important.
So, firstly, begin by understanding its importance. Whether you’re recording audio for a song, podcast, or voice-over reel, clear and professional audio plays a significant role.
Also, make yourself familiar with the factors that cause audio issues, such as wrong microphone placement, background noise, or the use of low-quality equipment.
While recording, make sure to enunciate clearly, wear headphones, record a separate track for speakers, and use a pop filter for a clear recording.
In post-production, use good editing software, edit carefully, equalize audio, and seek professional assistance for better results.
This blog also includes signs of poor audio quality and a list of essential equipment for recording.
So guys, buckle up and get ready to produce the best quality audio track by following this amazing guide!